Canassic Chrome Part III - Finalizing the First Version
Refining Canassic Chrome with the Canon supplied software
Introduction
This is the third part of a short series where I create a Canon picture style that attempts to mimic the Classic Chrome film simulation provided by FujiFilm cameras.
If you have read the first two parts, you can find them here:
Canassic Chrome Part I - Getting Started
Canassic Chrome Part II- The Initial Match
In this third part, I will be finalizing the first version of this picture style. I say “first version” because I believe the picture style will need additional refinement after using it in a greater diversity of scenarios, like cloudy days, darker scenarios, pictures with people, more colorful places, etc. The current images I am using as a starting point are from a very similar environment. This limits the overall ability for this style to be successful in all scenarios but is a great place to start.
Since this style will evolve over time, I am applying a versioning scheme for the picture style. For example, the picture style available by the end of this process will be version 0.1 which I would consider a “pre-release” version. I will iterate the style and increment that version (0.2, 0.3 and so on…) until I feel confident it meets the level of quality to be considered a “release”, which would be 1.0.
Canon Picture Style Editor (PSE)
In the last post, I had used Lightroom for an initial edit. Admittedly, this might feel like I’m creating a “copy of a copy”…because I kind of am. I’m referencing the Lightroom edits and migrating them over to PSE where I can. At the end, PSE will create a Picture Style file which I can use in other Canon software (specifically DPP) when processing RAW files or install it in my camera to apply it directly to JPEGs as they are taken…which is my goal of all this.
Overview
While this is not a deep dive into the use of PSE, I will give a very high-level overview of how it is organized and how I am using it right now. PSE is organized into 3 basic areas: [Add as table, maybe?? With screenshots]
- Basic
- Six Color-Axes
- Specific Colors
Since I am new to this software, I am only using the first two sections. The third section, Specific Colors, provides adjustments to very specific color ranges which I have found challenging to use without creating a lot of artifacts in the image. I’ll get to that level of proficiency one day…but today ain’t that day. Even without it, the first two sections provide a great deal of flexibility for tuning a picture style.
The hidden 4th section (really the 0th)
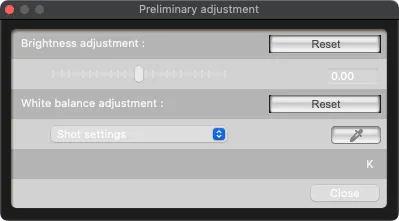
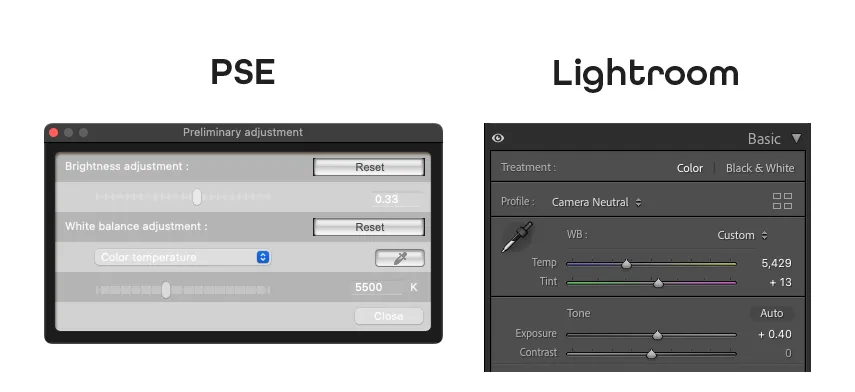
There is one more area of PSE that adjusts the image called “Preliminary Adjustment”. It is accessed from the main menu and opens in a separate dialog. It does very basic brightness and white balance adjustments to your image.
I imagine this is separated out of the main UI since it doesn’t get included in the picture style file and is, ultimately, set up in your camera separately. I have applied similar adjustments to my image based on what I did in Lightroom.
Basic
For the basic section, I am mostly carrying over what I did in LR with its “Basic” and “Tone Curve” sections. Initially, I set the Base Picture Style to “Neutral” similar to the “Camera Neutral” in Lightroom. Carrying over an overall decrease in saturation in the sliders. I also slightly bumped up the contrast in PSE. That edit was more informed from my preliminary research into FujiFilm’s Classic Chrome than my edit in Lightroom.
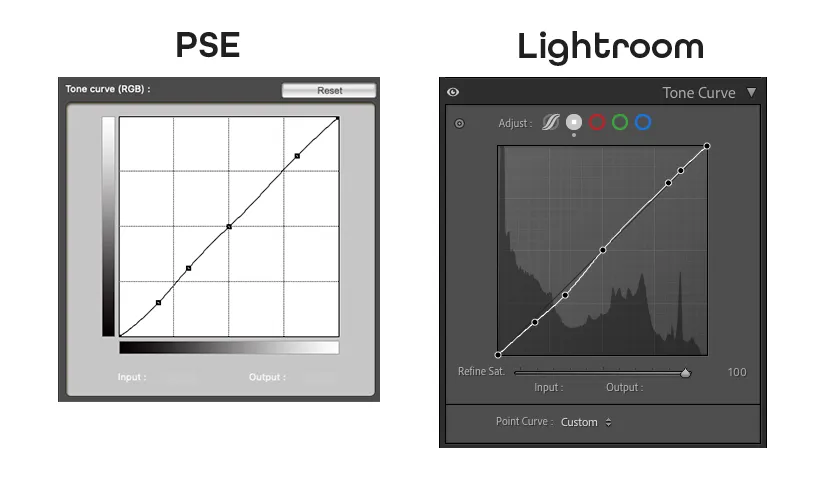
The Tone Curve is copied over pretty close to the exact curve from Lightroom.
Table of curve point values
| Lightroom | PSE | ||
|---|---|---|---|
| Input Value | Output Value | Input Value | Output Value |
| 0 | 0 | 0 | 0 |
| 45 | 40 | 46 | 40 |
| 82 | 73 | 81 | 80 |
| 128 | 128 | 128 | 128 |
| 208 | 210 | 207 | 210 |
| 223 | 225 | ||
| 255 | 255 | 255 | 255 |
Six Color-Axes
This section is more tricky. While the PSE does provide HSL (Hue, Saturation, Luminance) sliders for colors like Lightroom; it only provides it for 6 color ranges, as opposed to the 8 from Lightroom. The ranges are also slightly different where Lightroom sliders range from -100 to 100, PSE ranges from -30 to 30. I also don’t think using -100 in Lightroom is the same as using -30 in PSE but I am still learning.
Either way, this is some trial and error just like in Lightroom but having some basic guidance from the edit in Lightroom makes this much easier. Here is where that ended up. Here I compare the edit in PSE and the original FujiFilm image.
Specific Colors
As mentioned earlier, I skipped this section. I tried it out for a minute but was doing more harm than good. I’ll probably return to this at a later date.
Issues
While functionally fine, PSE has quite a few User Experience issues which can make it frustrating at times. I’ll talk about this in more detail in the future but I can’t help not mentioning one behavior. Whenever PSE is not the “Focused” application, all the auxiliary windows disappear. This may be typical behavior in how window management works in MacOS but that makes it very frustrating when needing to reference the values in PSE with the values in Lightroom as the UI’s keep disappearing when I bring Lightroom into focus.
A solution would be to allow these parts of the UI to be combined into the main UI, similar to how Lightroom provides the UI for sliders and how Canon Digital Photo Professional can do it (they make it an option). This doesn’t make this process of mine impossible, just unpleasant at times. Here is a short demonstration of what I am referring to.
Saving my first Picture Style
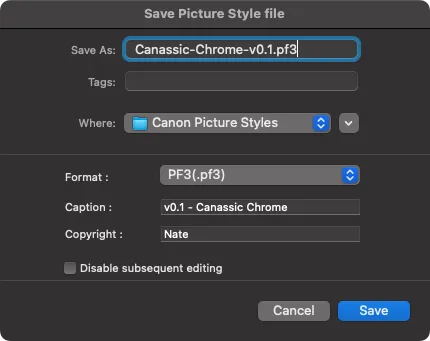
Now that I have gone back and forth between the sections a few times, making adjustments here and there, I am ready to save this as a Picture Style. I am able to add a name and description that will show up when transferring it to my camera. One thing I make sure NOT to do is check the box that states, “Disable subsequent editing”. This would prevent anyone, including me, from being able to edit this picture style. Since I will be iterating this picture style, I don’t want to do that. Even when I’m “done” I would like others to be able to use it to customize their own picture style and use it how they want.
Now it’s time to see how it works…in other software first.
Canon Digital Photo Professional(DPP)
Now that I have the initial picture style created, I can verify it in the other Canon software, DPP. I’d like to just put in the camera and go, but it is much faster to look at it here and make any changes, if I need to, while on the computer.
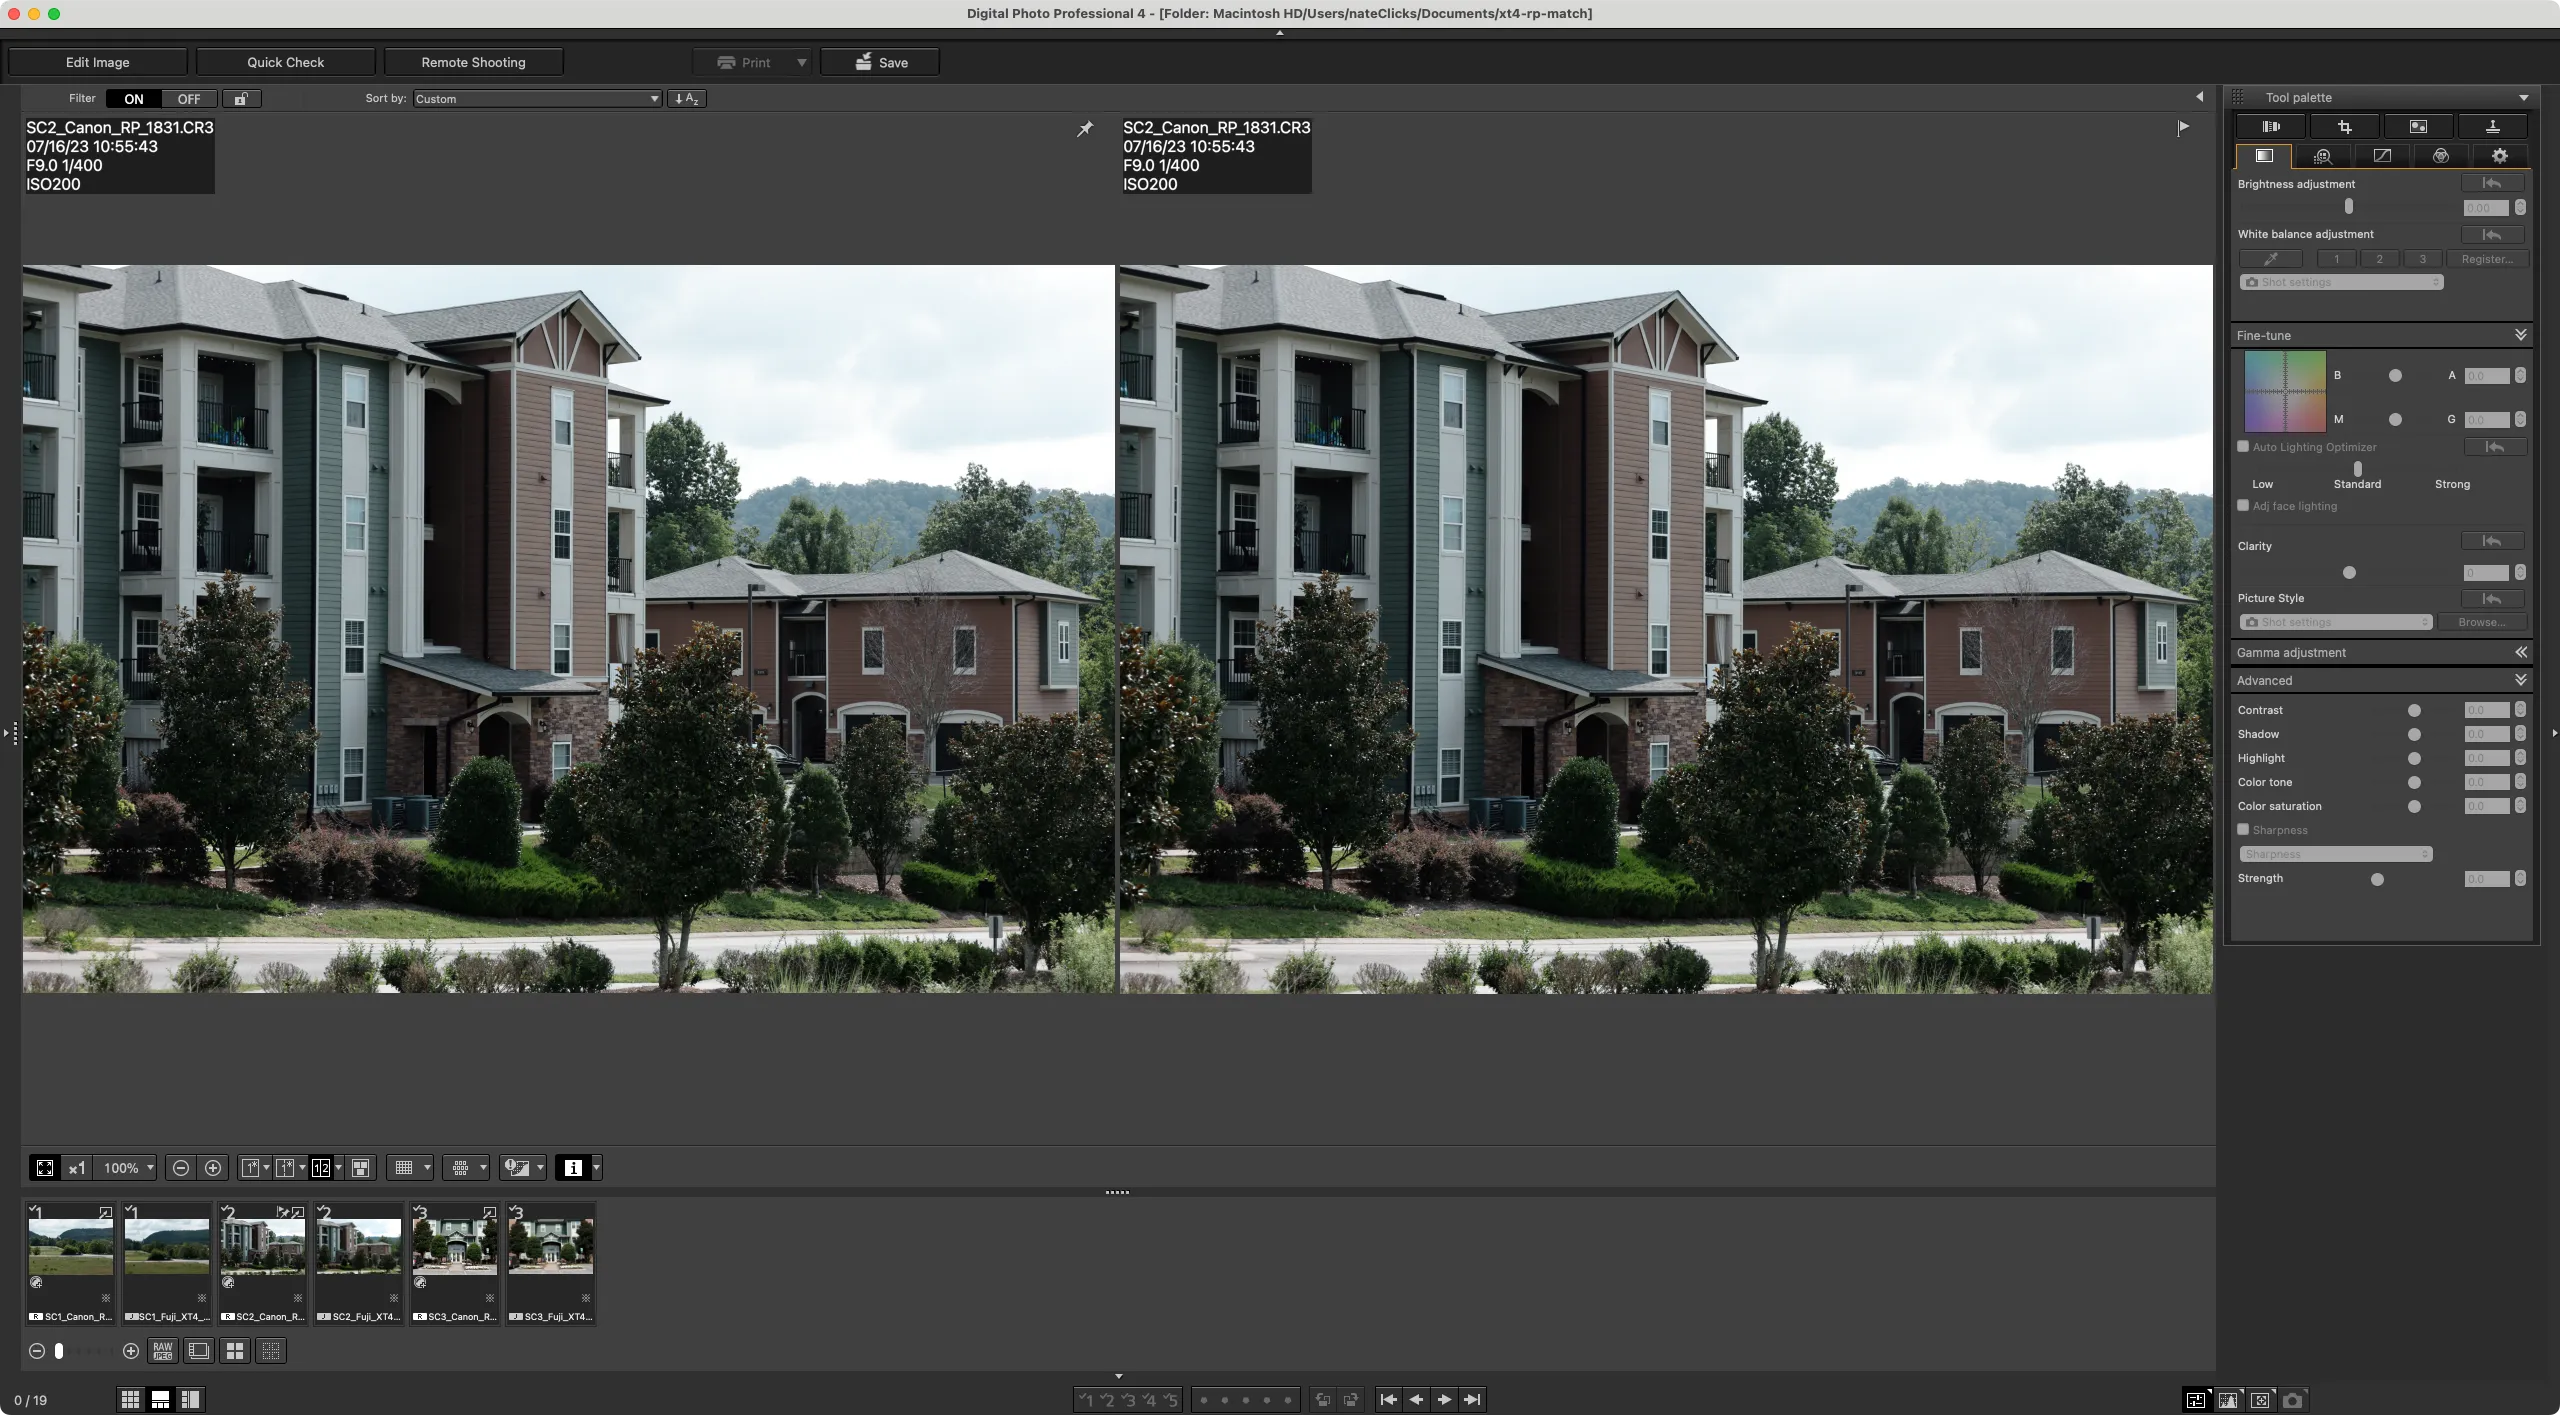
Canon DPP allows me to apply this Picture Style directly to a Canon RAW file. This should allow me to see what it would be like to do the same thing in camera…I think. Using Canon DPP also allows me to apply some settings that I would typically do in camera like White Balance, White Balance Shift, Auto Lighting Optimizer, etc. Basically, this is as close to the camera experience as possible without just using the camera.
Another nice thing about DPP (there are many NOT nice things, BTW) is that, just like Lightroom, I can look at a reference image while making edits. This allows me to reference the FujiFilm Classic Chrome JPEG that I originally used as reference in Lightroom. This way I don’t get too far away from the original style I’m trying to replicate.
So the steps here are pretty simple:
- Adjust White Balance
- Set Auto Lighting Optimizer as desired
- WB Shift (Didn’t do it this time)
At this point, I try a different image of the 3 images I am using and apply the picture style to them to see how it works.
If I can’t get it quite right, the process is to go back to PSE, make some adjustments, save it, go back to DPP, apply it, repeat as needed. I do wish this workflow of “round-tripping” was a little more refined, but it works and it got me to a final stopping point for version 0.1 of “Canassic Chrome”. I cringe less each time I say that but still cringe a little each time.
Conclusion
I feel like I have this picture style at a solid stopping point. Now, I need to put it in a camera and go shooting. The first 3 images I have used are pretty similar and I need to go put Canassic Chrome through its paces in different environments. That will help me refine it more for version 0.2
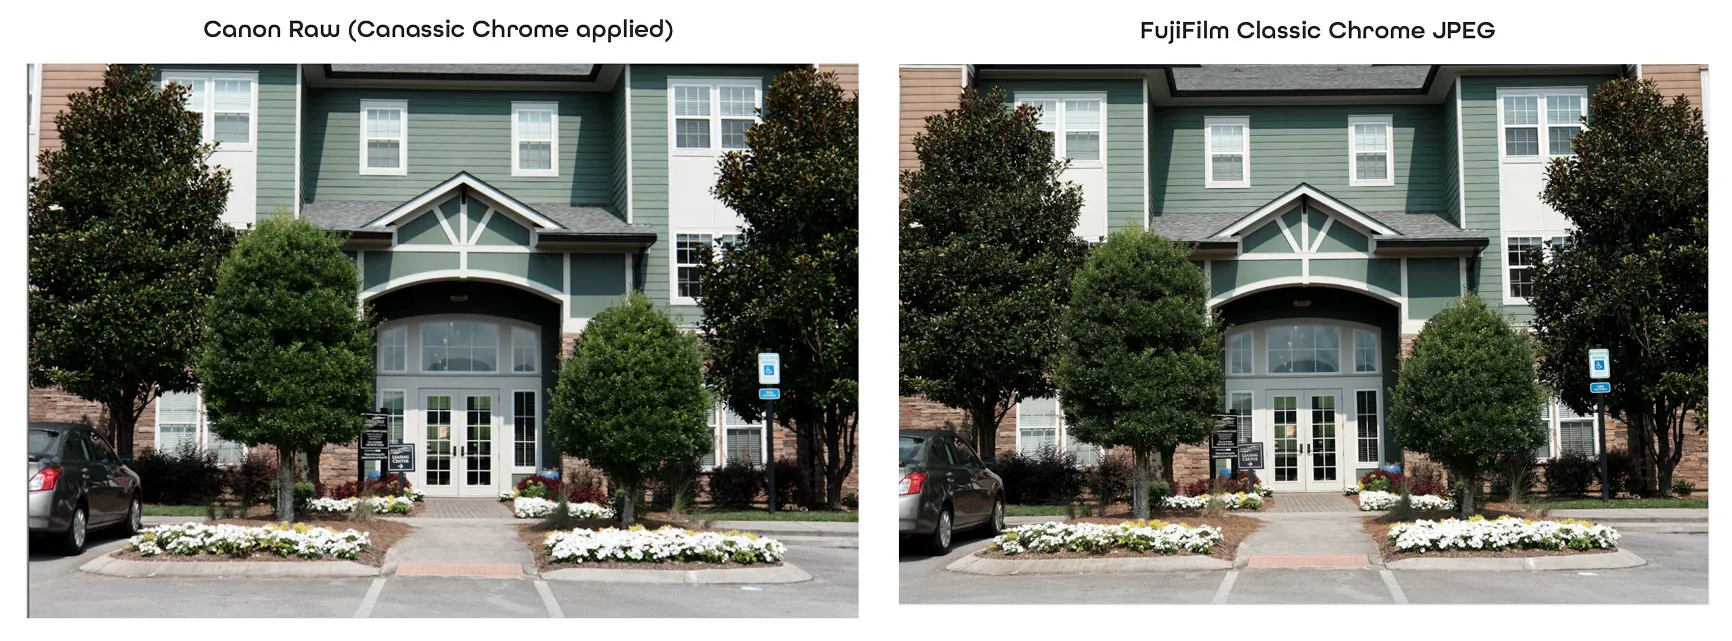
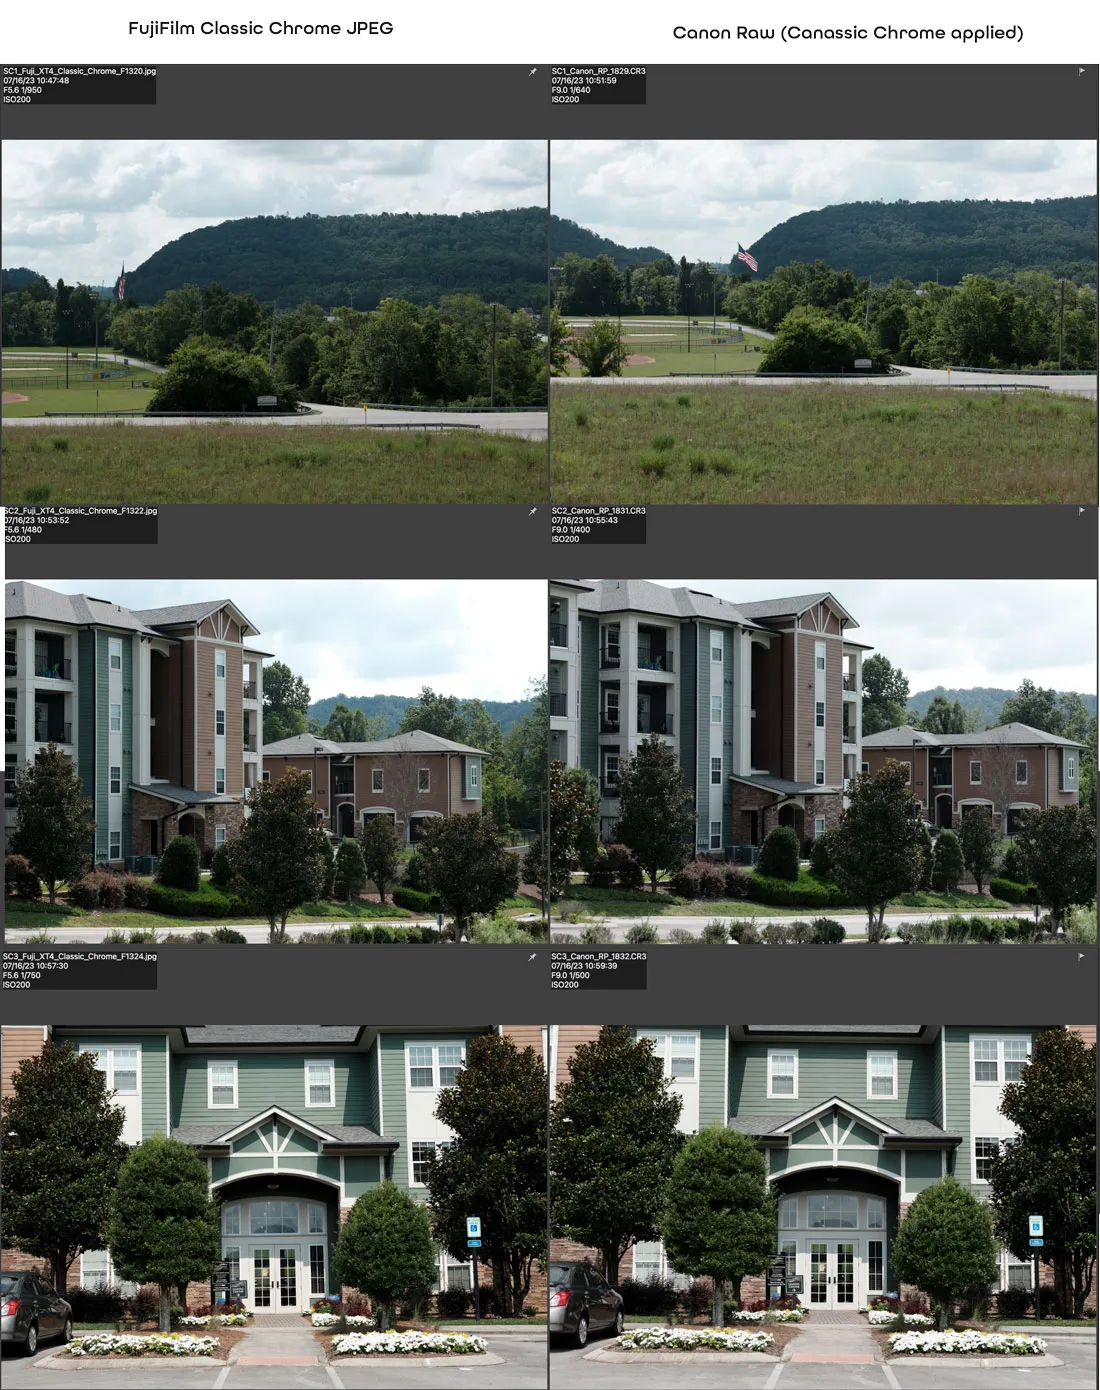
Here are the applications of Canassic Chrome v0.1 on the Canon RAW files compared to the FujiFilm Classic Chrome JPEGs SOOC (Straight out of camera).

